Shortcuts in 3Ds Max
P, F, L - View port Shortcuts are used for switching between the 3 different view ports 'F' stands for front view port on the top right of the screen in 3Ds Max.
'L' stands for left view port on the left side of the screen.
Alt+W - Toggle enlarge/shrink view port makes the view port bigger and smaller
Alt+X - Toggle transparency ON/OFF Make the shape transparent.
Shift+move - Copy & Instance copies the shape
Snaps Toggle Snaps the shape to the ground on the same line.
Angle Snap Toggle Snaps the shape on the same angle.
Show frozen in grey- freezes the shape in place and it can not be moved until you unfreeze it.
UVW Map creates a shape of lines that can be moved.
Source: https://www.youtube.com/watch?v=ljiE7URTnDc
Source: https://www.the-blueprints.com/
SculptFab
A free version of Autodesk Mudbox
Positives
-
It is simpler than mudbox
-
Easy to learn
-
It's free so it can be accessed by anyone
-
Fun program to use for fun but nothing major
Negatives
-
It has less options than in mudbox
-
Does not have as much detail as Mudbox
-
It's expensive £12 a month, £90 a year and £270 for three years so it's expensive.
Reflection
I would rather use Mudbox than SculptFab because it's more professional and more serious. I will not say that sculptFab is bad becasue it is not but I find Mudbox more interesting and more professional but if my college did not offer Mudbox as a program I would use SculptFab instead.
Mudbox
Shortcuts in mudbox
Sculpt Tool (Ctrl key)
Used to give shape to the object that is being made.
Smooth Tool (Left Shift to start smoothing While in Sculpt)
Used to Smooth out rough edges.#
Stencil (Can be found at the bottom right of the program)
Move Stencil
(S+Scroll Wheel)
Rotate Stencil
(S+Left mouse button)
Scale Stencil
(S+Right mouse button)
Can be used to Translate Images into Mudbox by sculpting them into the object selected
Subdivision Levels
(Left Shift+D Button)
It give the object more polys which means more detail
Layers
(Right side of the screen)
Adds layers of paint to your object.
Practice in Mudbox
First Try
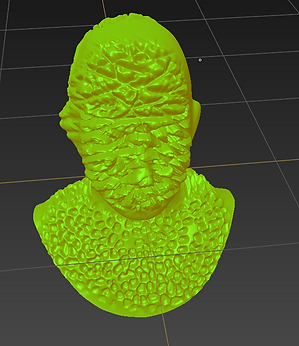
A man next to a tree
Not much use of the tools
Second Try
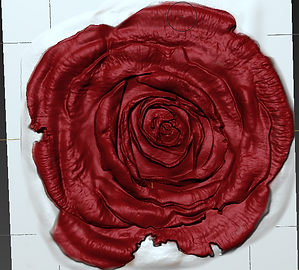
Rose
Used the stencil and the sculpt tool with the paint
brush at the end to add detail.
The Detail setting Is set to Level 9
after level 9 the program crashes.
Third Try
A Burning tree
Used the brush Tool and the grab tool.
Reflection on My tries
I found it harder than predicted with my first try I tried to make a simple scene with a man and a tree but in the end it looked worse than I wanted. My second try was a rose that got stenciled on Firstly I made the shape of the rose then increased the poly count to level 9 to maximize the detail of the rose it turned out great I really like it then I added colour for more effect and after that I added a white background. I had some trouble with the rose at the end the files size was massive I had to move it to my local Disk C because my main drive that I hold all my work was filled with this file. So I need to remember to lower the poly count after taking the Picture for my site. I still need lots of practice with Mudbox to feel more comfortable with it. A way to do that would be to watch some tutorials and then practice.


POT Means power of two
the resolution of textures in games always a power of two (128x128, 256x256, 512x512, 1024x1024, multiple of 2 etc). In short it's a set of simple criteria ensuring 2D image assets conform to regulated sizes and dimensions, which typically manifest as; 1) Date optimization and document size. Power of two is used for all types of productions like images and textures that need correct document size for them to work as effectively as possible.
What Type Of Games Use This Rule
All of them, because it's an underlying feature of the technolog
Source: https://www.katsbits.com/tutorials/textures/make-better-textures-correct-size-and-power-of-two.php


Photoshop practice
Photoshop
-
Document Size & Resolution
-
Clone & Heal tools
-
Offset / seamless
Document size should be 1024x1024 and 72 Resolution
Resolution does not change anything if your not printing it's only for printing.
The clone tool- Underlined areas get cloned.
Heal tool- make the lines smoother.
Offset- Make the image into four tiles which can be edited.
Seamless- their is no lines that indicate the end of the texture.
The bird is an example of cloning and image placement. The the bricks are made to be a texture which is seamless.
Some shortcuts
Ctrl+T to Resize
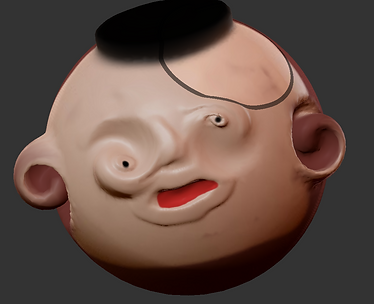
Stuff I added to the images I added the eye in the mouth and the eyes on the head
The over one had it's eye placed again and a hat got added but overall it was a test.


Tetris
The boxes start to accelerate when at higher levels are reached
Snappy it looks like the higher the level the magnetic the blocks get like they are forced into position
Describing words for Tetris
linear, Robotic,Snappy
Me trying out the animation tools in 3Ds Max


Reflection
I got the chance to practice some animation with tetris cubes in 3Ds Max which I found fun but hard to make so the animation part of the task I found hard and I need some practice with it. I think that the cubes are too fast for a tetris game and it should be more snappy than mine which is more smooth.
Feedback
As feedback I got told to make the blocks go slower and as I said in my Reflection to make it more snappy than smooth.